


 Gift Cards
 Film Index
 FAQ
FAQ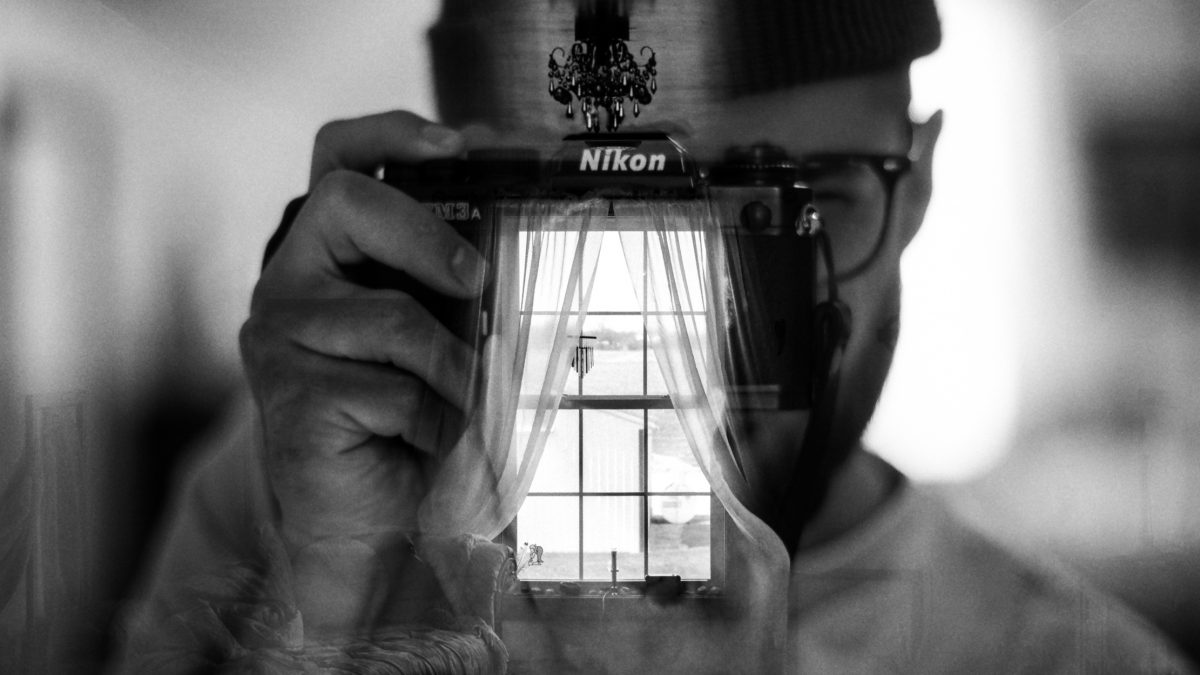
Portraits layered over mountain ranges, flowers dotting the contents of a coffee cup, a cityscape rising from the ocean. The possibilities for creative captures are limitless when you dive into the world of double exposures. While they may seem intimidating at first, film double exposures are not as complicated as you may think. Here are some tips about how to capture a great double exposure on film!
https://www.youtube.com/watch?v=DKJS0Z6G3ZY
Camera
Not all cameras can shoot double exposures. Some older, fully manual cameras allow you to stay on the same frame between shots making it very easy, but other cameras have to be “tricked” into doing so. To keep it simple, we recommend getting a camera that has a dedicated setting for multiple exposures. Unsure if your camera can shoot double exposures? Do a quick Google or YouTube search on your camera’s specs and you should be able to find out quickly.
If your camera does not have a multiple exposure setting, you’ll shoot the entire roll (first pass),
- Load and shoot a roll of film as you normally would for your first pass
- Pull the leader when the roll is finished
- Reload it into your camera for the second pass
- Shoot over it again creating double exposures
The only trick with this technique is being careful to align your second set of frames. Use a marker to mark the film’s position at the mouth of the cartridge. This will let you know that you shouldn’t pull your film beyond this line when you reload the film for the second pass. Also, keep your first set of images in mind. It’s a lot to remember so you may want to take notes of the images you shot
Film
For the best double exposures, we suggest using black & white or color negative film as they have good exposure latitude which means they handle over-exposure well, making metering much less intimidating. Between the two, we highly recommend black & white since its lack of color simplifies overlapping images and has the best exposure latitude. While you can capture double exposures on E-6 slide film, you will need to pay very close attention to your metering since it has less exposure latitude and is much less forgiving when overexposed.
Metering
For most people, metering correctly is the most intimidating aspect for double exposures. The good news is, with the right film selection you can pretty much meter normally without blowing out your photos. Yes, a double exposure literally means you’re exposing the frame to light twice so you’ll want to underexpose by cutting the exposure in half, so the double-exposed shots equal out to a fully exposed image. With that being said since black & white and color negative film do so well with overexposure you’re still likely to get great results if you shoot each exposure normally.
The best way to master metering for double exposures is simply to go out and try it. In the end, it all depends on the results you want and the framing of your shots. Keep this in mind: anything that is white/bright will destroy information and anything black/dark will maintain information for the next exposure.
Anything that is white/bright will destroy information and anything black/dark will retain information of the second exposure.
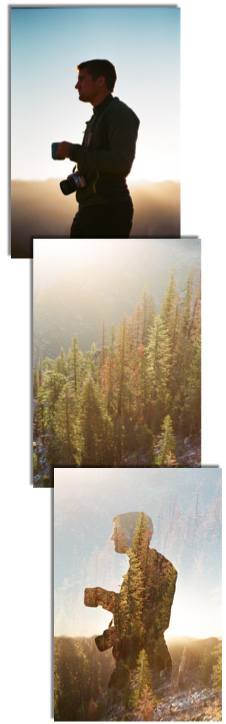
So the shadows from your first exposure will be filled by your second exposure and the highlights from the first exposure will be pretty much gone. As seen in the 3 part graphic: If your first exposure is a silhouette, the dark silhouette will retain the overlapping information of the second image and the white/bright part of your first exposure will get rid of it.
There you have it. All it takes to start capturing some amazing double exposures on film is the right camera, some forgiving film, careful metering, and a creative eye! Below are some double exposure examples with some insight on how they were created.
An easy first step in double exposures
If you’re just starting out, try pairing silhouettes with patterns. Try pairing a silhouette portrait, interesting shadows, or a dark object with foliage, a mesmerizing sky, or city skylines.

 What’s the Best Film?
The most comprehensive index of film types; characteristics, examples, and reviews. View Index
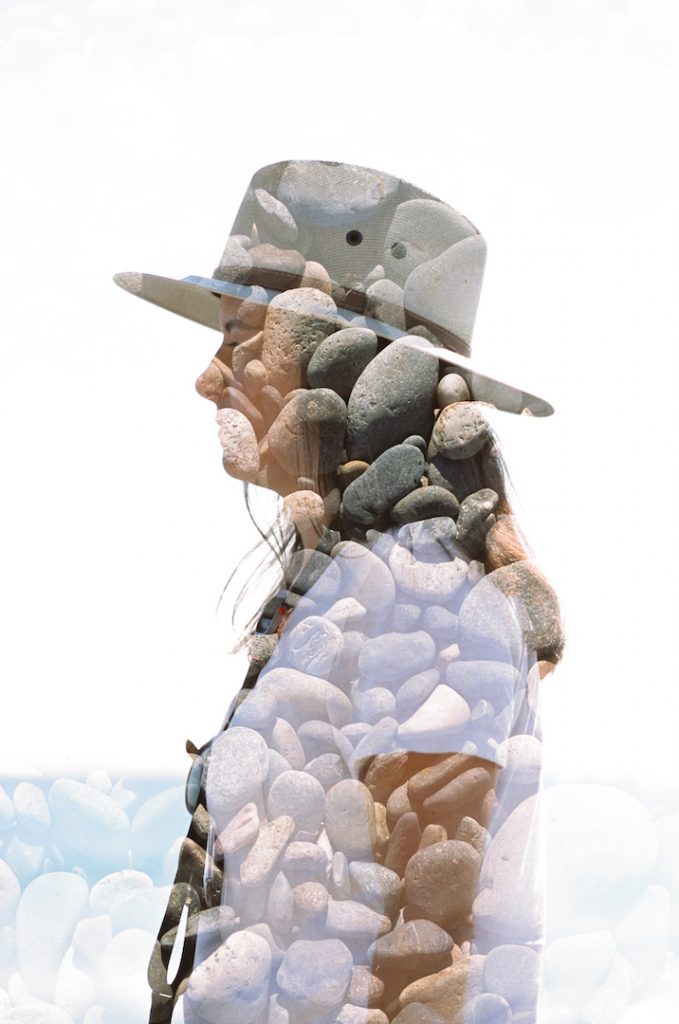
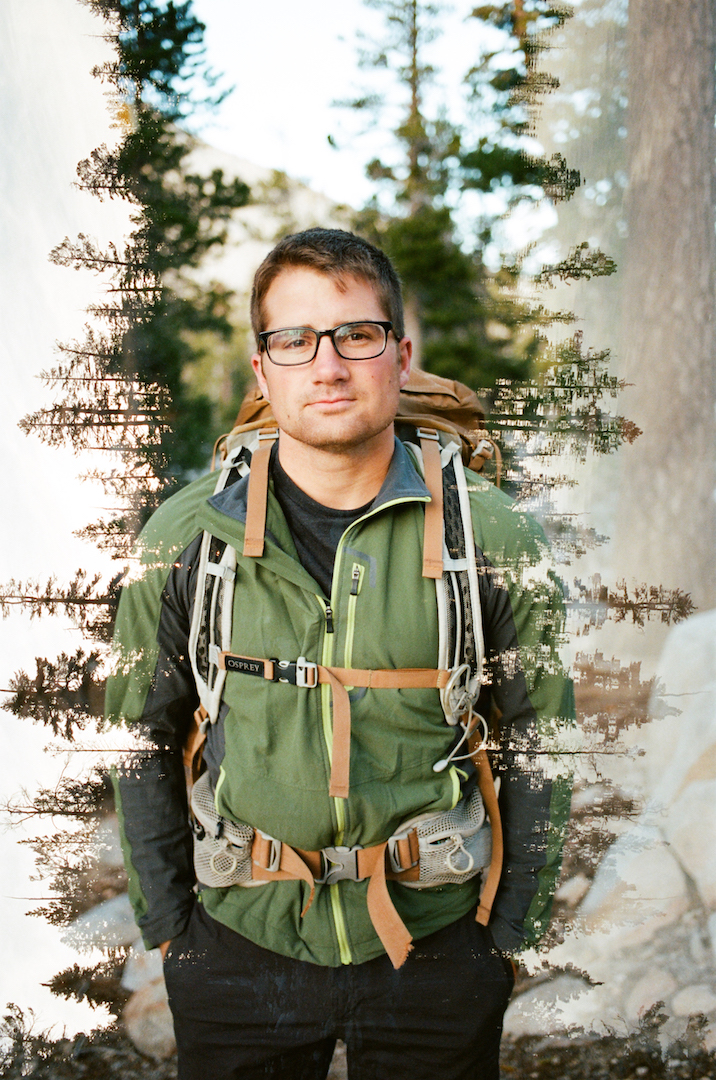 This double exposure was captured on Portra 400 with a Canon Elan 7 – 50mm f/1.8
The landscape was taken first and was metered for the highlights and the portrait was taken 2nd and was metered for the skin tone. Since the evenly exposed skin tones overlapped with the dark shadows of the first shot the portrait shows really well. If you want to see the features in a double exposure portrait you should evenly expose the skin tone and overlap it with the dark part of the first exposure.

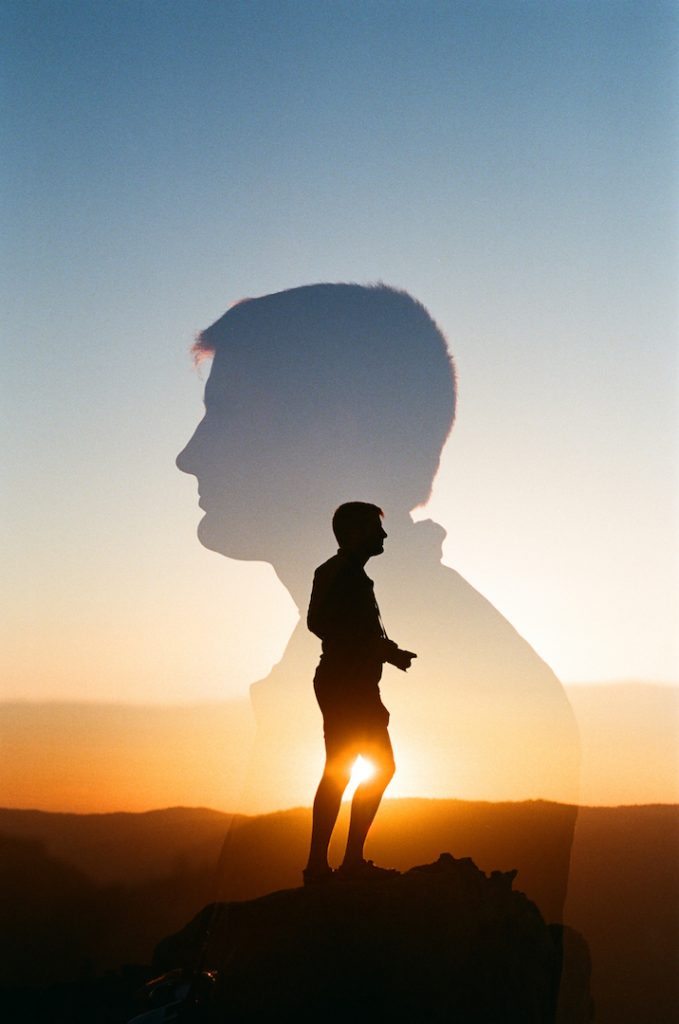
Captured on Portra 800 with a Hasselblad 503 – 80mm f/2.8
If you want a silhouette double exposure you need to expose for the highlights for the silhouette shot and then evenly expose for the other shot. The dark silhouette will retain the evenly exposed image and the bright part of the silhouette image will eliminate the evenly exposed image. This camera didn’t have a multiple exposure setting so the film back was removed before cocking the shutter, then put back on for the second exposure!
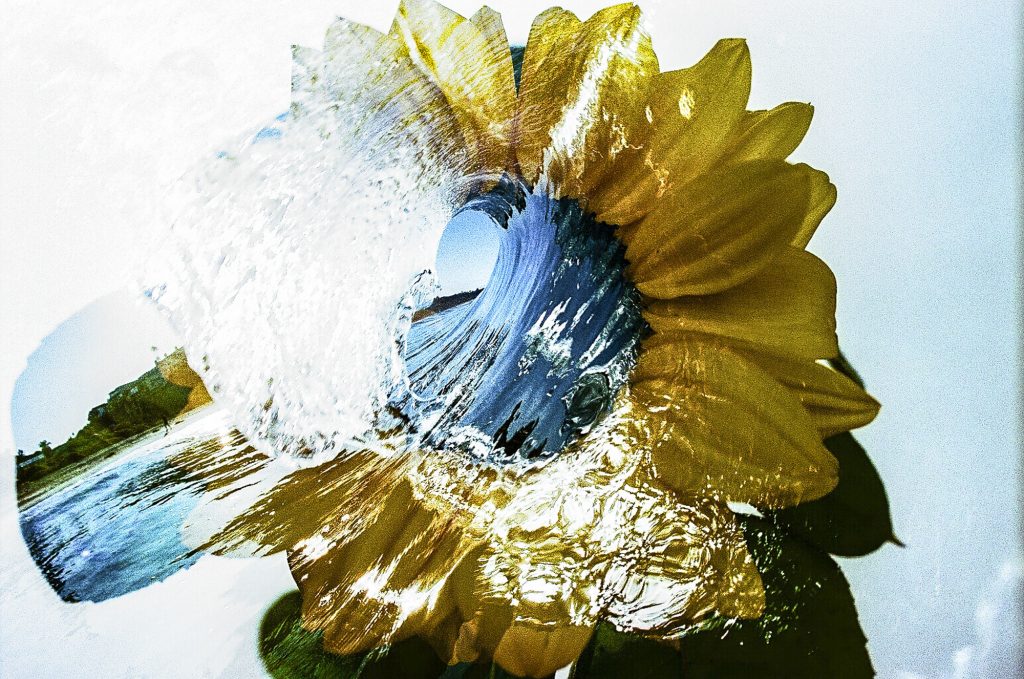
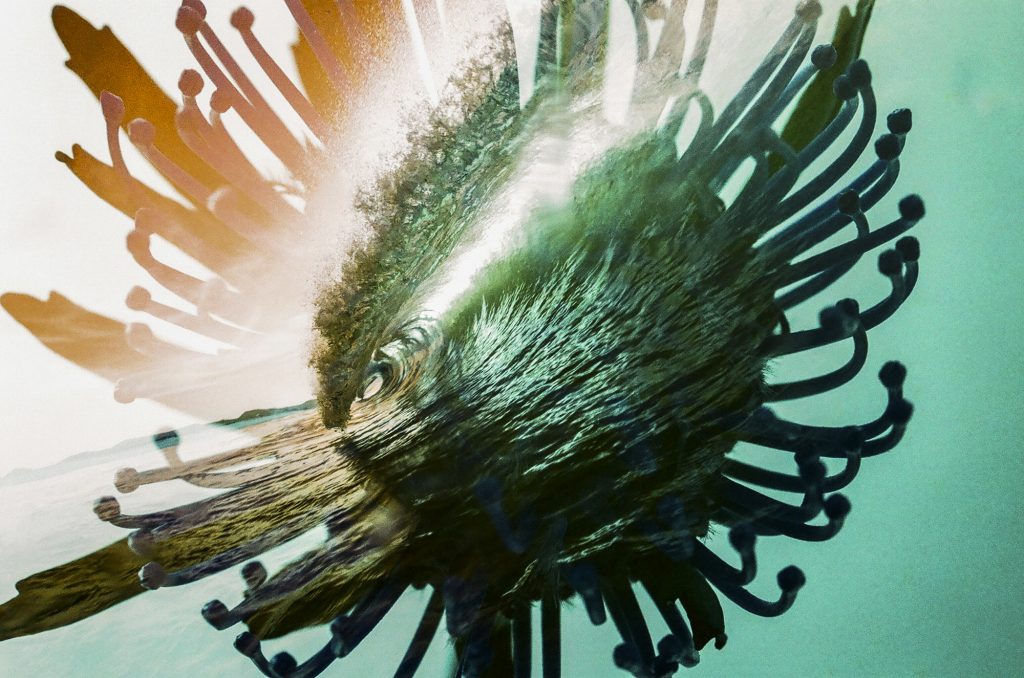
The first six double exposures were shot all with a double exposure setting but these two examples by Aaron Checkwood were shot at separate times. Meaning, he shot all the flower shots first, removed the film, then reshot all the wave shots, overlapping them. When doing this technique you need to use the same camera and pay close attention to putting the film in the same way so your frame lines match.
“Like any double exposure you want to create some dark areas so using flowers that have darker tints usually work best for me. I usually shoot the flowers first and try to blow out the background as much as possible which is insanely difficult to meter. Too shadowy on the flower and you lose the details and too exposed and you lose wave features. The other part that you have to consider is the actual wave. When I shoot in the water I use a fisheye so I’m inside the tubing part of the wave—the roundness creates shadows around the edges on the flowers and therefore you see more flower details. I used to use funky films so I could cross-process them and get weird colors, but now I want true colors so I’m sticking to Velvia 100 and pushing it a stop.”
To see more of Aaron’s work check out thecheckrepublic.com and follow him on Instagram at @the_check_republic.
Captured on Portra 160 with a Canon Elan 7 – 35mm f/2
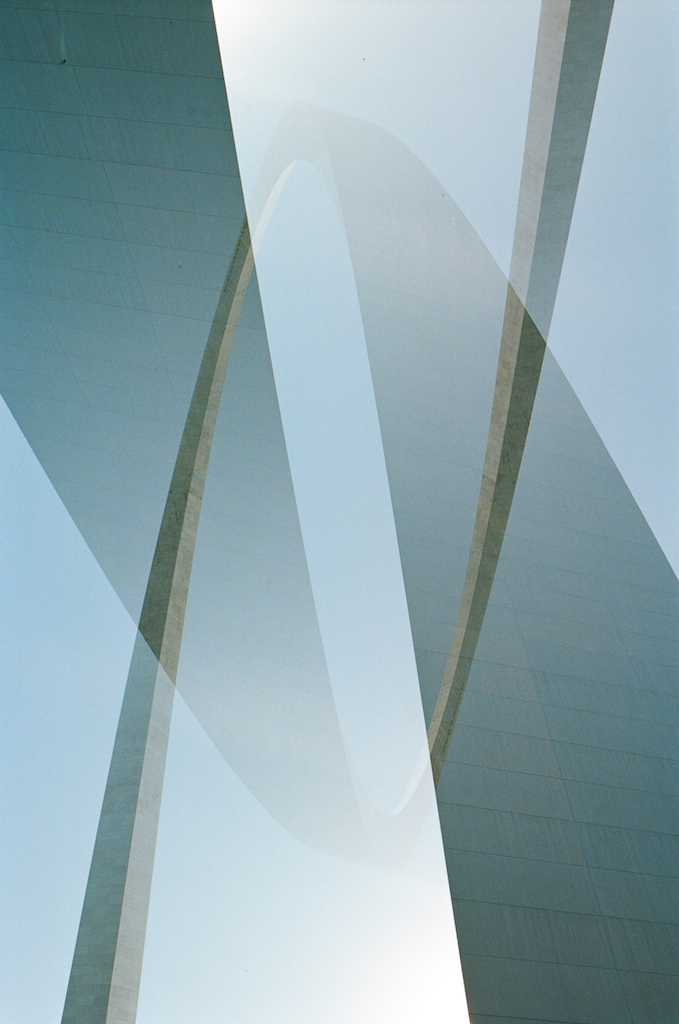
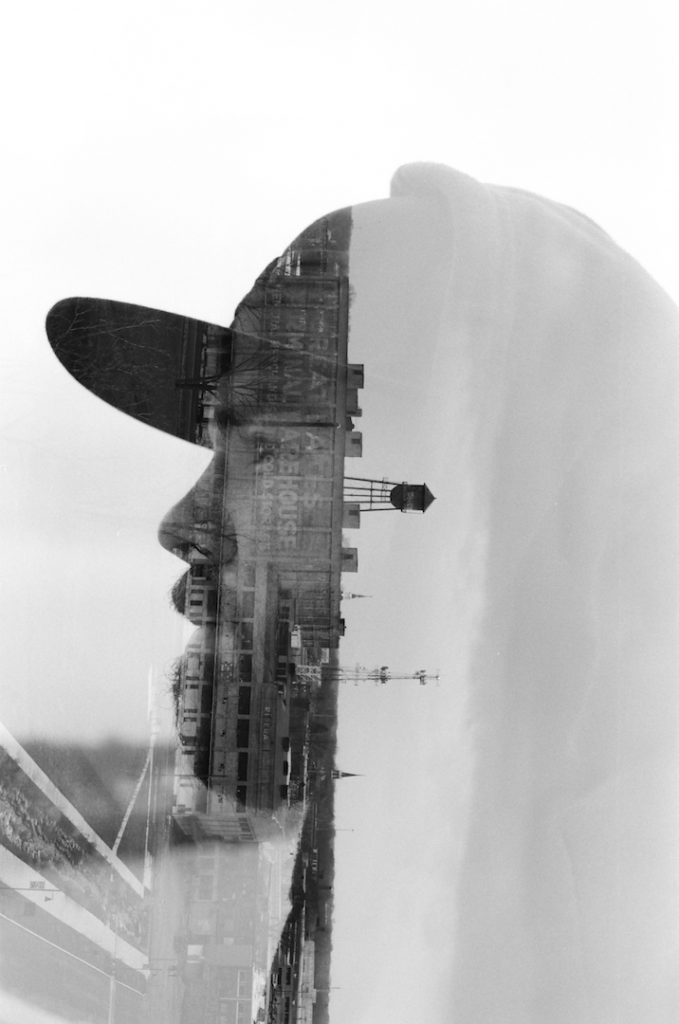
This St. Louis Arch double exposure was created by metering for the mid-tones for each shot and flipping the camera to create this abstract look.
This Provia 100f double exposure was taken with an Elan 7 – 85mm f/1.8.
Slide film doesn’t have a lot of exposure latitude which means you need to pay close attention when metering. The first shot was the silhouette – metering for the skin tones which means the bright sky is blown out. The second shot was the rocks metered for the highlights. When these two exposures are overlapped the blown-out sky destroys the overlapping rocks but the dark part retains the images.
This double exposure was captured on Acros 100
Both shots were metered for the mid-tones and the highlights still didn’t blow out which shows the amazing exposure latitude of B&W film. If both shots were metered for the shadows the highlights would have completely blown out which would have made this double exposure much stronger.
Captured on Lomography 400 with a Canon Elan7 – 50mm f/1.8
This is two over-lapped silhouettes that were both metered for the highlights. The first silhouette was taken up close and the second from much further back so the further back silhouette was framed in the closer up one.